
Blog
4 Ways to Control Humidity in an Encapsulated Attic – GreenBuildingAdvisor
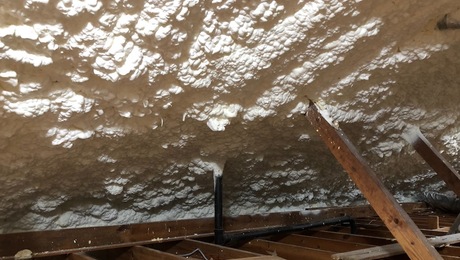
Bringing an attic within the building enclosure that defines the conditioned space has a lot of benefits. By having the insulation and air barrier at the roofline, the attic stays close to the temperature in the living space below. That helps make heating and cooling more energy efficient if you have equipment or ducts in the attic. It also makes the attic a better place for storing stuff. But you have to be careful. If you don’t control humidity in an encapsulated attic, you can create some serious—and expensive—problems.
Control humidity, you ask? Do I really need to do that? Well, maybe. If you’re in a dry climate, you probably don’t need to worry about it unless you have an aquarium obsession or cook a lot of pasta. Also, it’s not often a wintertime problem because cold air is dry air.
But if you’re in a humid climate—especially hot or mixed humid—you should be proactive and address the potential for moisture problems.
Let’s look at four ways to do that.
1. Supply air from the HVAC system
This is the most common and least expensive way to condition an encapsulated attic. With ductwork in the attic, you tap into the supply side and add a small amount of heated or cooled air to the attic. That makes the attic directly conditioned.

How much conditioned air should you supply? As with encapsulated crawl spaces, you generally want 20 to 50 cubic foot per minute (cfm) of air flow for each 1,000 square feet (sf) of attic floor area. The idea is that in summer, that provides just enough cool, dry air to control humidity in an encapsulated attic.
It’s not a bad way to control humidity in an encapsulated attic, but it’s not ideal either. The primary reason to go with a different method is that there’s not a separate thermostat for the attic. That means the HVAC system runs when the living space below needs cool air, not when the encapsulated attic needs drying. So, you may not do enough drying with this method, especially on those cooler summer days when the AC doesn’t run a lot, but the humidity is high.
Another potential problem with this method is that it pressurizes the attic. That can force attic air and any odors it contains down into the house. Or, if the attic isn’t well sealed to the outdoors, it can send conditioned air outside.
2. A small exhaust fan
This method takes a nearly opposite approach. Instead of supplying conditioned air directly to an encapsulated attic, you exhaust a small amount of air from the attic. Assuming the attic is well-sealed to the outdoors, this method results in indirect conditioning of the attic. The exhaust fan creates a negative pressure in the attic, and that allows conditioned air from the living space to move up into the attic.
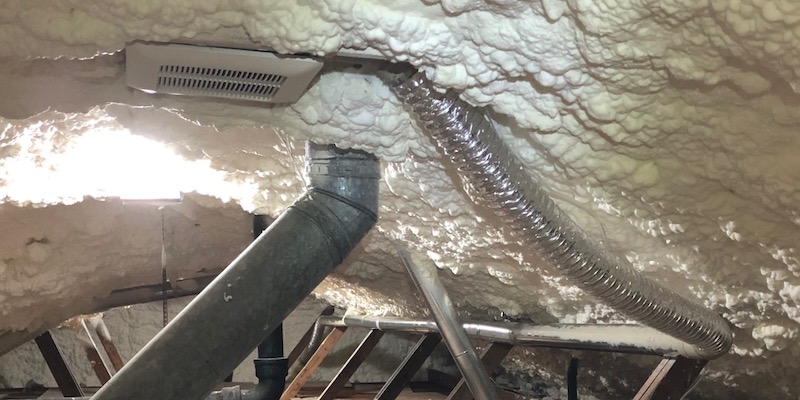
The amount of air you want to exhaust is similar to what you’d supply with the previous method: 20 to 50 cfm per 1,000 sf.
One advantage this method has over adding supply air is that you can control it based on the needs of the attic. In my house, I have a fan that can run at 50, 80, or 110 cfm. I also have the switch on a controller that allows me to run the fun continuously (60 minutes per hour) or however many minutes per hour I want. Because it’s needed only for cooling season, I leave it off in winter. Lately I’ve been running it at ~30 minutes per hour in the summer.
I wrote about the results of using this method in my own house, and you can read that article to see how well it has performed.
3. A dehumidifier
If you’re in a hot or mixed humid climate, this one’s the best way to control humidity in an encapsulated attic. It operates based on the conditions in the attic, and it controls the humidity directly…by removing water vapor from the attic air. We specify dehumidifiers just for dehumidifying encapsulated attics in a lot of our HVAC design jobs at Energy Vanguard.
Yes, it’s another piece of mechanical equipment to buy, install, and maintain. But if you go another route and end up with mold in your attic or rotten roof decking, you’ll wish you had installed a dehumidifier.
4. A vapor diffusion vent
This final method is not like the other three. Those all rely on air movement to control humidity in an encapsulated attic. This one relies on the process of vapor diffusion.
If you follow the work of Dr. Joseph Lstiburek at Building Science Corporation, you may have seen him talk or write about vapor diffusion vents. The idea here is to take advantage of the stratification of humidity that occurs in encapsulated attics. The graph below shows that humidity peaks in the afternoon of a summer day. And it also is higher near the ridge than at the attic floor…a lot higher sometimes.

So, Dr. Joe found that by providing a way for that water vapor to exit the attic at the ridge, you can get rid of a lot of the humidity. The vent at the top is, as the name says, for vapor diffusion. You don’t want air going through there because an encapsulated attic should be airtight.
But when you have a high concentration of water vapor near the ridge, putting a vapor permeable material like house wrap over an expanded ridge vent gap allows water vapor to diffuse though the vapor diffusion vent and leave the attic. For more details on this method, see his article, Venting Vapor.
With a complex roofline, installing a vapor diffusion vent can be tricky. And you may not like the look of the expanded ridge vent. (See Photograph 7 in Joe’s article.) Also, he says it’s really only for IECC climate zones 1 through 3.
Oh, and you still have to do one of the three methods above. Dr. Joe recommends 50 cfm per 1,000 sf of supply air. This combination, though, overcomes one of the disadvantages I mentioned above: supply air being controlled by the needs of the living space below.
Type of encapsulation
I haven’t said anything about the way an attic is encapsulated, so let me cover that here. First, you can encapsulate by putting the insulation on top of the roof deck or between the rafters beneath the roof deck. Second, you can do it with air-permeable insulation materials like mineral wool and fiberglass. Or you can use air impermeable insulation like rigid foam or spray foam. Spray foam comes in two types: open-cell, which is vapor permeable, and closed-cell, which is vapor semi-impermeable.
The encapsulated attics that need humidity control the most are those with air-permeable insulation or open-cell spray foam insulation beneath the roof deck. With insulation on top of the roof deck, humidity control is less of an issue. You shouldn’t see the daily swings in humidity that I showed in the graph above because the roof deck is protected from outdoor temperature swings. But it’s not a bad idea to monitor the attic conditions.
The nitty gritty
When you move the building enclosure to the roofline, you change the moisture dynamics of a house. Depending on the climate and the type of encapsulation, you may need to control humidity in an encapsulated attic. If you do, here’s how I rank the methods above in terms of how well they’ll do the job:
- Dehumidifier. This method attacks the problem head on.
- Supply air plus vapor diffusion vent. A good one-two punch.
- Exhaust fan. This can work in a mixed-humid climate but may not be up to the task in a hot-humid climate.
- Vapor diffusion vent. It may be adequate by itself in less humid areas. Or maybe you have enough duct leakage in the encapsulated attic, so you don’t have to add more supply air.
We get asked about humidity in encapsulated attics a lot. It’s a real issue, and now you know that there are solutions. The problem is that every house is different, and the number one answer to building science questions is “It depends.” If you’re having trouble sorting through this, contact us at [email protected]. We do consulting and can help you with isolating the problem and coming up with a good solution.
Allison A. Bailes III, PhD, is a speaker, writer, building science consultant, and the founder of Energy Vanguard in Decatur, Georgia. He has a doctorate in physics and is the author of a bestselling book on building science. He also writes the Energy Vanguard Blog. For more updates, you can follow Allison on LinkedIn and subscribe to Energy Vanguard’s weekly newsletter and YouTube channel.
Weekly Newsletter
Get building science and energy efficiency advice, plus special offers, in your inbox.