
Blog
Air-Sealing Windows: Methods That Work – GreenBuildingAdvisor
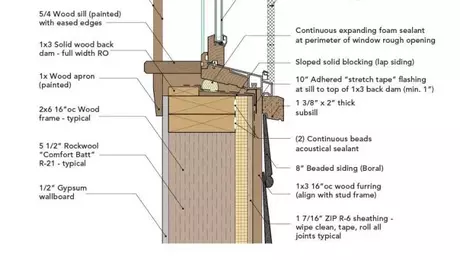
EDITOR’S NOTE: This post is part of the Expert Exchange series, an editorially directed and expert-driven platform for information and discussion around leading-edge building science principles and projects. This series—made possible with support from our sponsor, Andersen Windows and Doors—is titled “Energy Smart Details for Windows and Doors.”
Windows challenge our walls. They create holes in all of the control layers—water, air, thermal, and vapor. That makes them one of the trickiest parts of the enclosure to detail. In this article, we’ll look at how to connect a window to the air control layer. For context, we’ll assume the window is installed using the drained method (not fully sealed), meaning the bottom of the window is left open to the exterior so that any incidental water can drain out.
How the drained method works
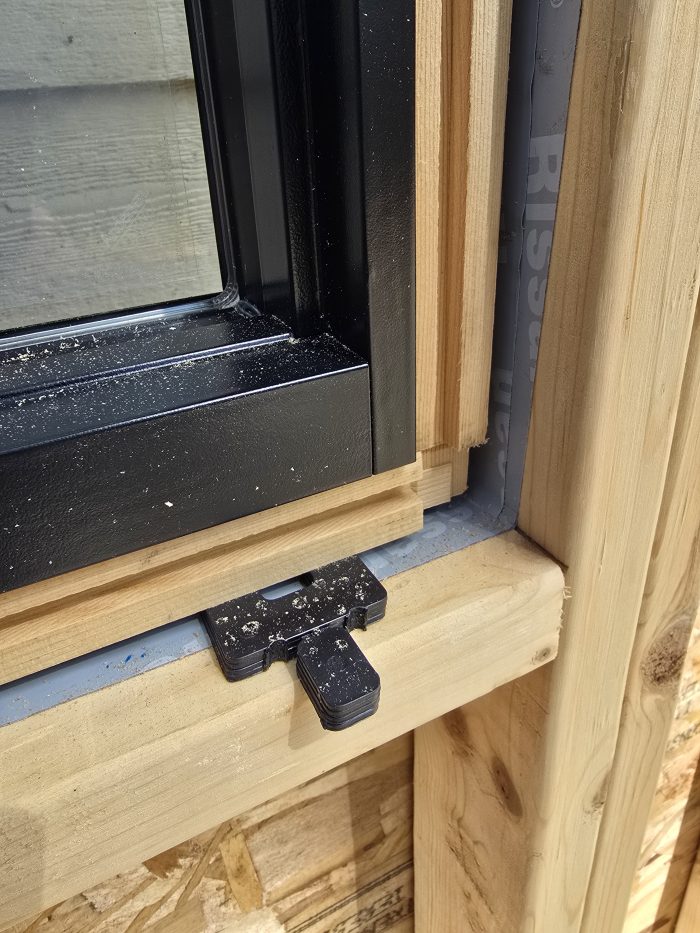
The drained method assumes bulk water will eventually find its way between the window and rough opening, either by way of a leak or a condensation event (humid air condensing on a cold surface). To manage this, we protect the sill—the area likely to see the most water—using some type of sill pan flashing, ideally with sloped sill and a back dam. The bottom of the window is not sealed during installation, which allows any water that gets in to find a path back out. This opening creates a spot for air to enter the system.
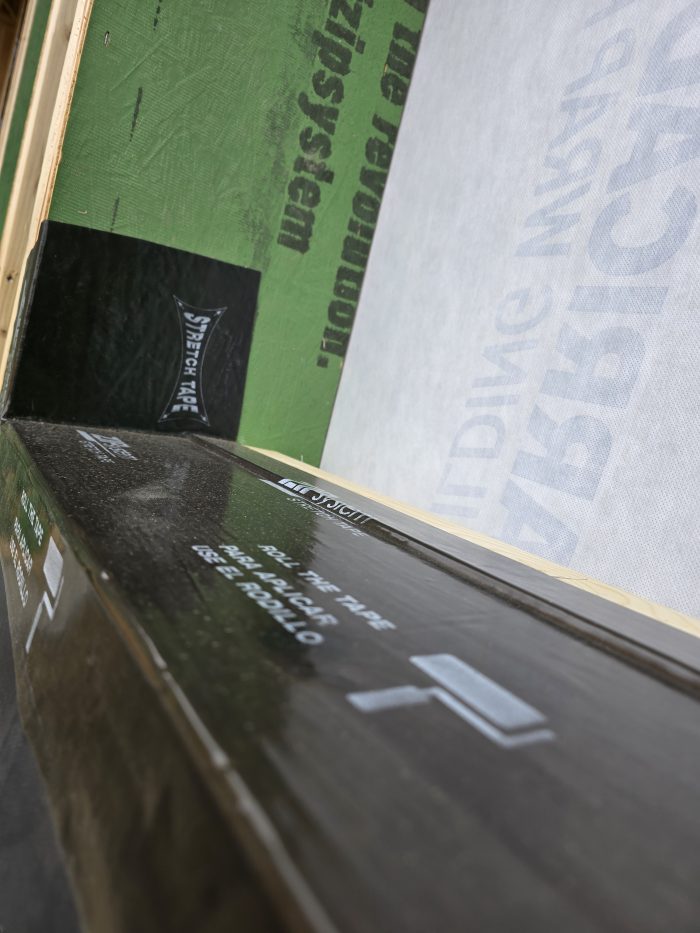
The jambs and head are sealed with caulk, tape, and/or other products to prevent bulk water intrusion. A metal head flashing is also recommended. This approach creates resiliency in the system: first, to block water at the head and sides; and second, to freely exit at the sill if it finds its way in.
We’ve done our best to keep water out of our window assemblies and then to provide a pathway for any water that does find a way in. We do not want our interior air-sealing strategy to prevent water from freely draining. Certain air-sealing methods can restrict the pathway. The photos below are of a test jig I set up using clear plexiglass and a window rough opening mockup. When using canned expanding foam around window openings, you cannot see how much foam is expanding into the opening. The foam may be filling the entire space, or it may be leaving uneven surfaces between the nailing flange and inside of the framing for water to become stuck.
I’ve been on jobs where the most inexperienced person on the insulation crew is given a can of expanding foam, a long straw, and the task of air-sealing windows.
Before air-sealing, identify the primary air control layer
Before we plan an air-sealing strategy, we need to know the location of the primary air control and seal the window to that product. It might be:
- the exterior sheathing or a water resistive barrier (WRB),
- an interior membrane, or
- a layer within the wall, such as closed-cell spray foam or a membrane in the middle of a double-stud wall.
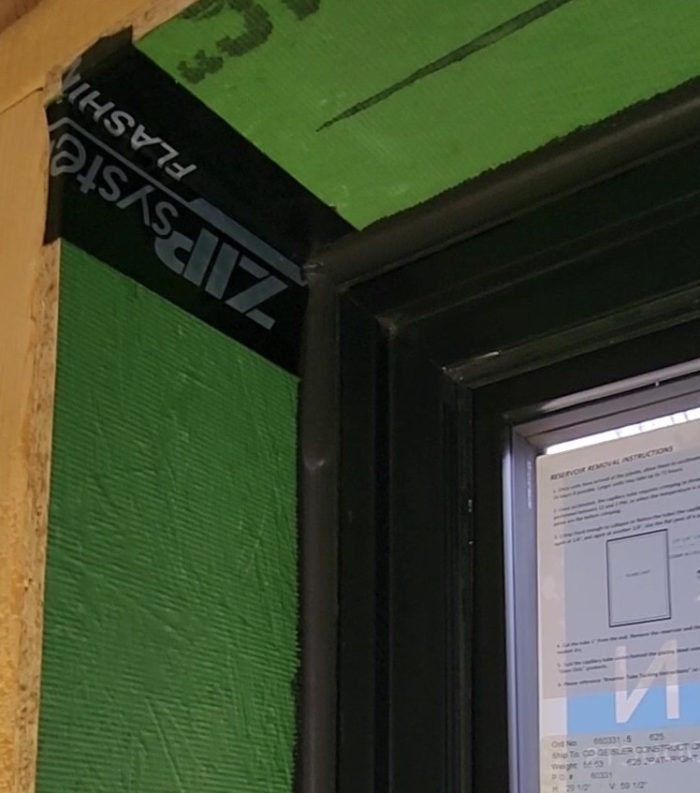
In the example shown below, the self-adhered WRB is acting as the primary air control layer. The weak points are at the rough opening framing connections and at the joints between the OSB sheathing and framing. To maintain continuity, I like to bring the air barrier into the rough opening with tape or sealant.
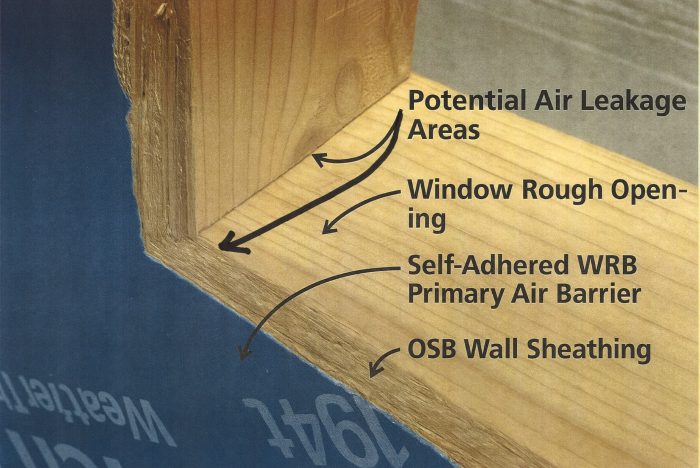
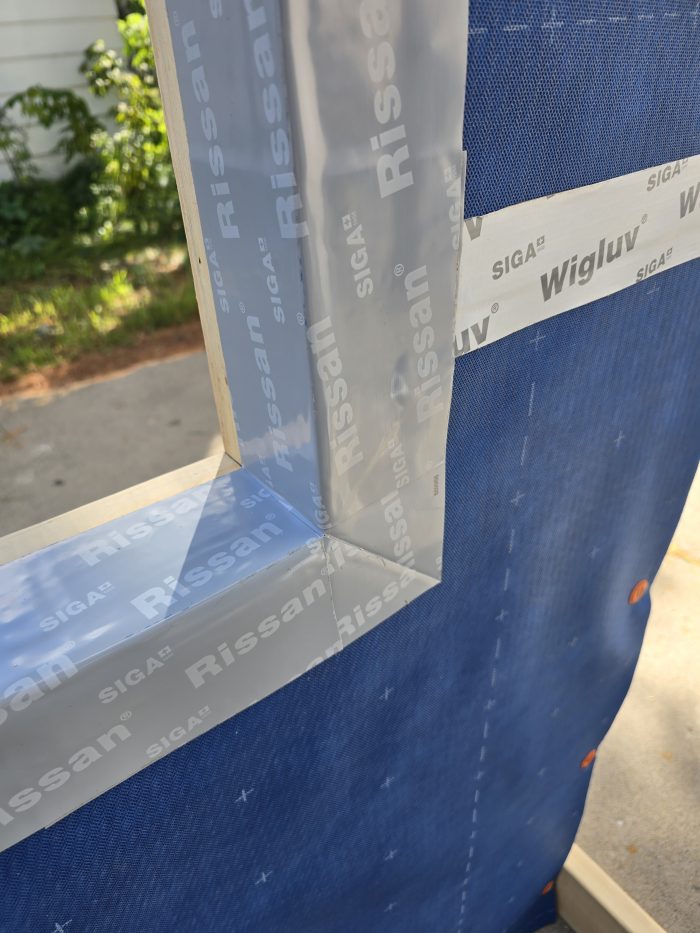
Next, we identify the air control portion of the window—the frame, including the interior side of the jambs, sill, and head. By connecting the frame to the rough opening, we achieve continuity across the assembly.
Old habits vs. best practices
When I first started in the trades, we stuffed fiberglass in the gap between the window and rough opening and called it good. We’ve since learned that fiberglass is a terrible air barrier. Today, four methods stand out:
- Canned spray foam
- Backer rod and caulk
- Tape
- Expanding foam gaskets
Method 1: Canned spray foam
Canned spray foam showed up on job sites in the mid-1990s. Back then, many of us misunderstood its purpose—I tried using it as glue and as a sealant.
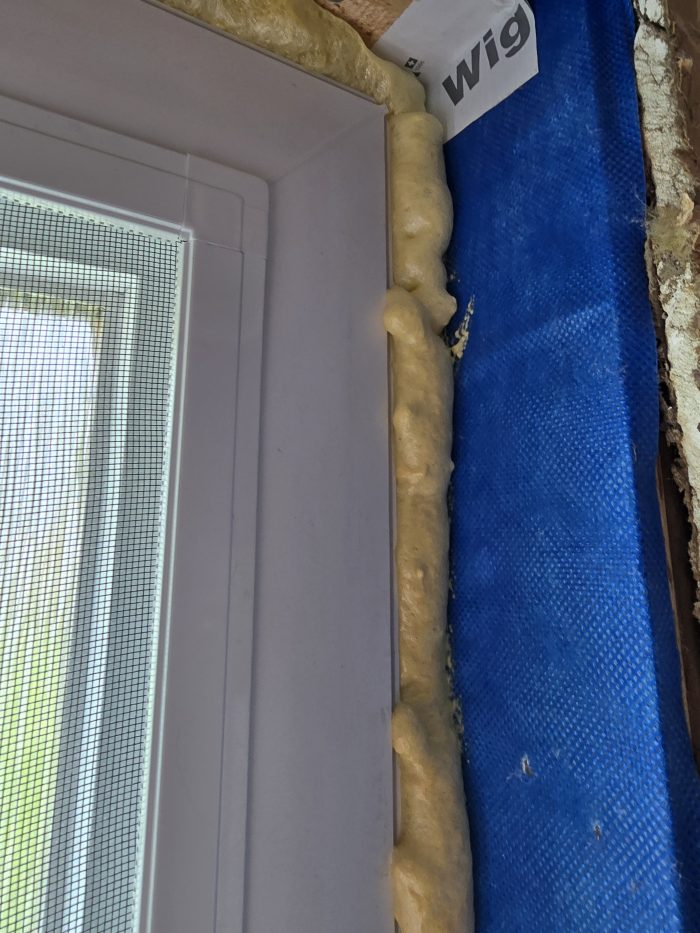
Low-expansion foams designed for windows and doors can be effective air seals, but there are caveats:
- Choose the right product. High-expansion foam can bow frames and prevent windows from operating.
- Continuity is tricky. It’s hard to guarantee full side-to-side coverage if shims or tight clearances get in the way.
- Drainage matters. Foam should not fill the cavity front-to-back. Leave space near the exterior so water can still drain.
- Durability is suspect. Wood framing moves as it dries and twists. Foam doesn’t always move with it, and seals can fail.
Because of these risks, I no longer rely on canned foam alone for air-sealing windows. If you do use foam, my suggestion is to place a backer rod first to ensure the foam doesn’t completely fill the cavity.
Method 2: Backer rod and caulk
This method is straightforward: Insert a round foam backer rod in the gap, then caulk over it to seal the joint.
- Advantages: You can see if the seal is continuous; it’s inexpensive; caulk has flexibility to accommodate wood movement.
- Disadvantages: It’s slower than foam, can get messy, and struggles with wide gaps; if the space between window and framing is more than about half an inch, spanning with caulk becomes more difficult.
Still, for modest gaps, this method is reliable and durable.
Method 3: Tape (my preferred method)
Specialized interior window air-sealing tapes have become my go-to. I use Siga Fentrim 20 most often. It has a narrow strip that bonds to the window frame and a wider strip that attaches to the rough opening.
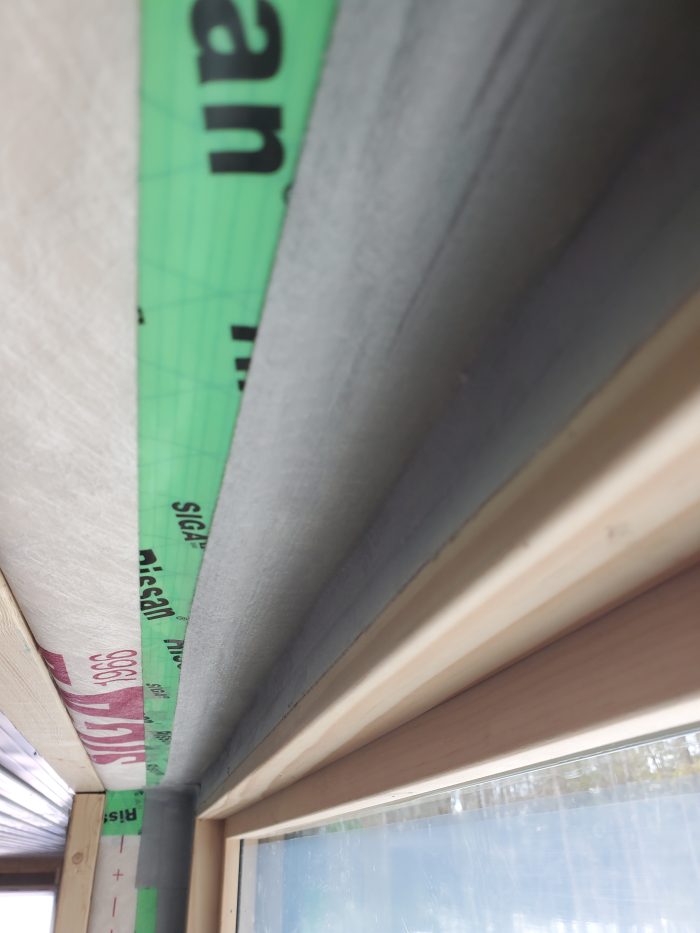
My process typically starts with backer rod to fill and insulate the gap. On one project, a barndominium build (shown in the photo above), the window-to-rough-opening gap was unusually large—about 1-in. I used 1¼-in. backer rod before applying tape to span the gap.
Other manufacturers with similar products include Pro Clima (Contega Solido) and Rothoblaas (Plaster Band In). As far as I know, no North American manufacturer has produced a tape specifically designed for this purpose.
- Advantages: You can see if the seal is continuous, the tape accommodates framing movement, and it spans larger gaps better than caulk.
- Disadvantages: It’s slower and more expensive than foam. On the barndominium project, each window took nearly 30 minutes to detail.
Method 4: Expanding foam gaskets
More common in Europe, this method uses a precompressed foam strip installed in the rough opening or around the window frame before setting the window. The foam slowly expands to fill the gap.
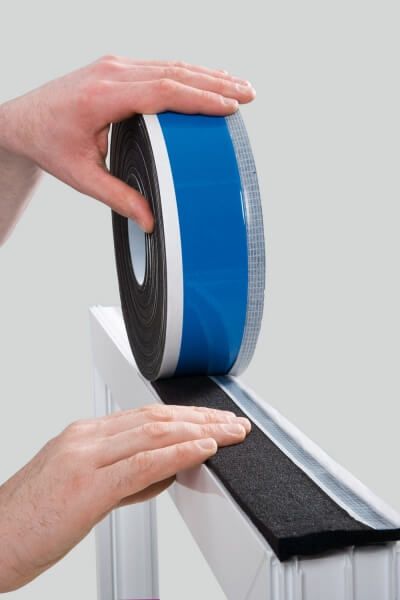
I’ve only used similar tapes in steel roofing, where they worked well to seal corrugations. My concerns for window use are the short working time—especially in hot weather when expansion speeds up—and the need for hands-on training and/or practice to use them properly. Still, the approach can be effective.
Dealing with challenges
Installing windows requires the use of shims, and some use metal straps for securing the window to the rough opening. Both can be an impediment when trying to air-seal.
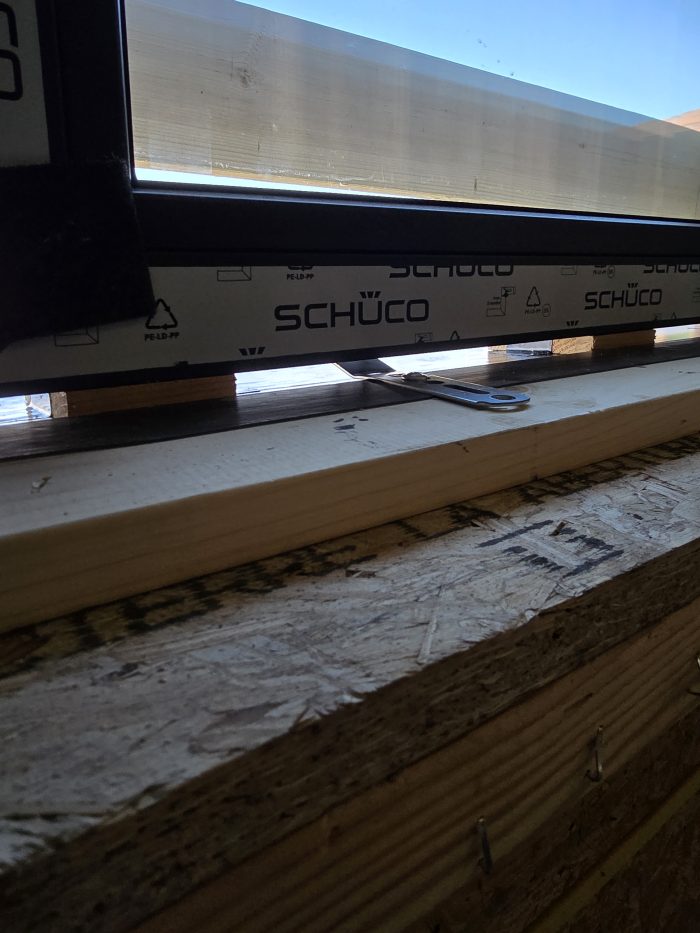
Window openings are called rough openings for a reason; they aren’t always level, plumb, and square. You might be tight with the window to the rough opening at the top and have a large gap at the bottom. These large or very small gaps may cause some methods of air-sealing to be ineffective. I have used multiple air-sealing methods on the same project. Don’t be afraid to mix and match when needed.
Key takeaways
- Window rough openings can get wet in two ways: bulk water leaks from the exterior and air leaks from the interior where air containing water vapor condenses on cold surfaces.
- Start by identifying the primary air control layer.
- Fiberglass is not an air barrier—don’t use it for window sealing.
- Canned foam works in some cases, but it can be a risky air-sealing measure.
- Backer rod and caulk is dependable for smaller gaps.
- Tapes are my current preferred method for continuity and durability.
- Expanding foam gaskets are promising but need more exposure in North America.
Closing thoughts
Windows interrupt every control layer in a wall. If we don’t tie them carefully into the air barrier, the performance of the whole assembly suffers. The good news is that today we have multiple proven methods—tapes, caulks, backer rod, foam, and gaskets—that make it possible to integrate windows into a continuous, durable air control system. The best choice depends on the size of the gap, your budget, and your comfort level, but all of these are far better than the old fiberglass-stuffing approach many of us started with.
GBA editor Randy Williams is a recovering general contractor who performs energy auditing and building investigations in Grand Rapids, Minn. He teaches and speaks about building science topics around the country. Photos by the author unless otherwise noted.
Weekly Newsletter
Get building science and energy efficiency advice, plus special offers, in your inbox.